Planning our ideas to survive 10 years in a Zombie Apocalypse You're living in a very secure wall around you, that no Zombies will be able to get in.
Planningthings to make a fire
shelter
have weapons on you
know how to fight
warm clothes and bedding/think clothes
tin can foods or packaged foods/bottles of water
Radio/batteries
medical kit/first aid kit
tools
transportation
communication
transportation
8 most important thingsfood
water
first aid/medical kit
power
shelter
clothing/blanket
tools
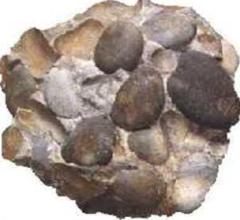
wood/rocks/stones
ShelterThings you need to consider
how are we going to keep everyone warm and dry
Insulation
Make sure the house doesn't make anyone sick/unhealthy
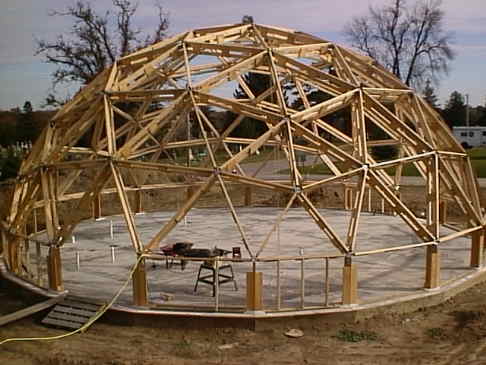
 http://www.stevetiffany.com/dome2.html

https://nz.pinterest.com/pin/551339179359119078/
These could be what we build for our Zombie Apocalypse
the triangle ones could be the rooms for bed time and the dome we could make 2 one for the kitchen and bathroom and the other for when it raining our really cold.
Team we need help from?We will need to communicate with the tools group and the clothing group to make sure no one gets sick and its built with tools.
Shelter:
What materials do you need to build your shelter?
Insulation, tent covering?, wool
Tools we need to build our shelter?
brick, wood, stone, metal
How will we build our shelter? Using strong woods and insulation
Whether conditions? 4 seasons, When its cold and wet with will cover the windows with tent covering and when its sunny we will take the covering off
how are we going to keep warm/cool within the shelter? Insulation, blankets, warm clothes/clothes to keep cool.
Building Our ModelsThis is 1 of the houses we made and this is made from using cardboard, paper mache, glue and paint.
This took about 2 days to build and dry and then took us about 4 days to paper mache and paint.
We yous a knife to mix everything together.
Why Shelter Is Important!
Shelter is very important to have because you need to be able to sleep somewhere when its cold and wet and when its snowing you don't want to be in the snow all the time because you could get hypothermia.
Facts About Shelters/Homeless
Around 100 million people around the world are homeless
More than 90% of homeless women are victims of severe physical and sexual abuse and escaping that abuse and is a leading cause of their homelessness
Find more info about Shelter and homelessness facts on this website above this message.
Building Another Houseone of our team mates made this with his dad
This is our biggest shelter/house that has been made, its made from wood and sticker paper and then we added some cardboard beds, a toilet and a kitchen inside.
This took about 1 week and a half to build.
How I Feel About This ProjectWe had fun making our projects and designing them and we think our team did a good job at this zombie apocalypse experiment.
How to build the small cardboard house
Step1. get the glue, water and plastic plate with something to mix with.
Step2. put all the ingredients onto the plate and mis using a plastic knife.
Step3.
Step4.
Step5.
Step6.
Step7.
Final Product
Our Team: Ansh, Luke, Stevie-Lee and Alayna (Me)


